

IP Address Errors
Are you having trouble accessing certain websites or applications? Does your internet connection seem slow or not working at all? If so, there might be an issue ...
Are you having trouble accessing certain websites or applications? Does your internet connection seem slow or not working at all? If so, there might be an issue with your IP address.
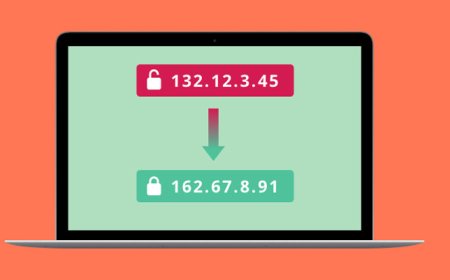
An IP address is a unique number assigned to every device connected to the internet. It enables data to be sent and received between computers, servers, and other devices. However, sometimes errors can occur that prevent your device from communicating properly with others online.
One common error is an invalid IP address. This occurs when your computer is unable to obtain a valid IP address from your network’s router or modem. Without a proper IP address, your device cannot connect to the internet, resulting in limited connectivity or no access at all.
Another issue is a duplicate IP address, which happens when two or more devices on the same network are assigned the same IP address. This conflict can lead to intermittent or complete loss of internet connection for one or both devices.
Other IP address errors include subnet mask mismatch, default gateway issues, and DNS server problems. These issues can cause slow internet speeds, difficulty connecting to certain websites, or even security vulnerabilities.
To resolve IP address errors, try resetting your network hardware, checking for software updates, and running network diagnostics tools. If the problem persists, contact your internet service provider or a technician for further assistance.
In conclusion, IP address errors can be frustrating and disruptive to your online experience. By understanding the common issues and taking steps to troubleshoot them, you can restore your internet connection and get back to browsing, streaming, and working without interruption.
How to troubleshoot IP address errors
Have you ever encountered an IP address error while browsing or trying to connect to a network? It can be frustrating, especially if you’re not tech-savvy. But don’t worry, troubleshooting an IP address error is actually easier than you might think.
First of all, let’s understand what an IP address is. An IP address is a unique identifier assigned to each device connected to a network. It allows devices to communicate with each other and access the internet. Sometimes, due to misconfiguration or technical issues, your device may run into an IP address error.
The first step in troubleshooting an IP address error is to check if your device is properly connected to the network. Make sure that your router or modem is turned on and that all necessary cables are plugged in securely. If you’re still unable to connect, try resetting your modem or router by unplugging its power cable for a few seconds and then plugging it back in.
If the above steps don’t solve the issue, you may need to manually configure your device’s IP address settings. This can be done by accessing your device’s network settings and entering the correct IP address, subnet mask, and gateway. These settings can usually be found on your router’s settings page or by contacting your network administrator.
Another common cause of IP address errors is conflicting IP addresses. If two devices on the same network have been assigned the same IP address, they won’t be able to communicate with each other. To fix this, you can either assign a different IP address to one of the devices or change the DHCP settings on your router to prevent this from happening.
Finally, if none of the above solutions work, you may want to consider contacting your internet service provider or a professional technician to help you troubleshoot the error.
In conclusion, troubleshooting an IP address error may seem daunting at first, but it’s actually a straightforward process. By following these simple steps, you can quickly resolve any IP address errors and get back to browsing the internet or connecting to your network without any issues.
Resolving DNS server issues
When you’re browsing the internet and encounter a DNS server issue, it can be incredibly frustrating. This issue can prevent you from accessing websites or cause slow loading times. Fortunately, there are some easy solutions to resolve DNS server issues.
Firstly, try clearing your browser cache and cookies. This is because outdated or corrupted data in your browser’s cache can interfere with your DNS server. To clear your cache and cookies, open your browser settings and find the option to clear browsing history. Ensure that the cache and cookies options are selected, then click on clear data.
If this doesn’t solve the problem, try resetting your modem or router. This action will reset your network settings and may fix any DNS server issues. To do this, unplug your modem/router from its power source for 30 seconds before plugging it back in. Wait for it to reconnect to the internet and check if the issue is resolved.
Another solution is to change your DNS server. Your internet service provider (ISP) assigns your default DNS server, but it may not always be the most reliable. By changing to another DNS provider, you may experience faster loading times and avoid any DNS server issues. Google Public DNS and OpenDNS are popular alternatives that you can easily switch to.
Lastly, if the above methods don’t work, try contacting your ISP. Sometimes, the DNS server issues can stem from problems with the ISP’s servers. In this case, they can assist in resolving the issue.
In conclusion, encountering DNS server issues can be frustrating, but there are straightforward solutions that you can try. Clearing your browser cache and cookies, resetting your modem/router, changing your DNS server, and contacting your ISP are all viable options to get your internet back up and running smoothly.
Fixing DHCP configuration problems
DHCP (Dynamic Host Configuration Protocol) is one of the essential services that enable devices to connect to a network and obtain an IP address automatically. However, like any other network service, DHCP can encounter configuration problems that may prevent devices from accessing the network or cause connectivity issues.
If you are experiencing DHCP configuration problems, there are several steps that you can take to troubleshoot and fix them. The first step is to identify the problem, which can be caused by various factors such as incorrect subnet mask, wrong IP address range, or unauthorized DHCP server.
Once you have identified the problem, you can begin fixing it by checking the DHCP server’s configuration settings. Ensure that the DHCP server has the correct subnet mask and IP address range configured. If the DHCP server is not authorized, it may not assign IP addresses to clients. Therefore, ensure that only authorized DHCP servers are running on your network.
Another common DHCP configuration problem is the presence of conflicting IP addresses. This occurs when two devices on the same network have the same IP address. To resolve this issue, you can release and renew the IP address lease on the client device or assign a static IP address to the affected device.
In some cases, DHCP configuration problems may be caused by firewall or security settings. Ensure that the firewall rules allow DHCP traffic to pass through without restrictions. You may also need to check the DHCP server’s security settings and ensure that they are correctly configured.
In conclusion, DHCP configuration problems can occur due to various factors, but with proper troubleshooting and corrective measures, they can be resolved quickly. By following the steps outlined above, you will be able to identify and fix DHCP configuration problems on your network. However, if you encounter more complex issues, seek the assistance of a qualified network administrator.
Ways to reset your network settings
In today’s digital age, staying connected to the internet is crucial. A stable and reliable network connection is a must-have for most people. However, sometimes network issues can arise, leaving you frustrated and disconnected. Resetting your network settings can help resolve these problems and get you back online quickly. In this article, we will explore some of the ways you can reset your network settings on different devices.
Resetting network settings on an iPhone is relatively easy. Start by going to the “Settings” app and selecting “General.” From there, select “Reset” and then “Reset Network Settings.” This will erase all Wi-Fi passwords, VPN, and APN settings, so be sure to have them handy before proceeding.
On an Android phone, the process may vary depending on the device and version of the operating system. Generally, you can go to “Settings,” then “System,” followed by “Reset options” and finally “Reset Wi-Fi, mobile & Bluetooth.” Again, this will erase all saved Wi-Fi networks and passwords, so make sure to have them written down.
For Windows computers, resetting network settings is done through the Command Prompt. Open the Command Prompt and type “netsh int ip reset” and press enter. This will reset the IP settings and flush the DNS cache.
Mac users can reset their network settings by going to “System Preferences,” clicking on “Network,” and then selecting the network you want to reset. Click on the gear icon and choose “Make Service Inactive.” After a few moments, click on the gear icon again and select “Make Service Active” to reset the network settings.
In conclusion, resetting your network settings can help resolve connectivity issues and get you back online quickly. Whether you’re using an iPhone, Android phone, Windows PC, or Mac, the steps are relatively simple and can be done in a few minutes. Remember to take note of your Wi-Fi passwords and other settings before resetting to avoid any inconvenience.
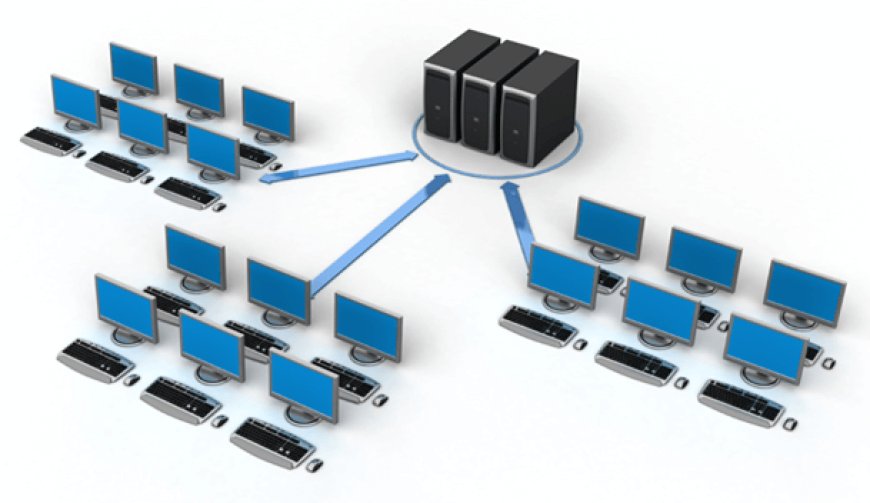
Checking for IP conflicts on your network
If you’re experiencing issues with network connectivity, it could be due to IP address conflicts. This is a common problem that occurs when two devices on the network are assigned the same IP address. To avoid this issue, it’s essential to know how to check for IP conflicts on your network.
One of the simplest methods of checking for IP conflicts is by using the command prompt in Windows. To do this, open the command prompt and type “arp -a” and hit enter. This will display a list of all the devices connected to your network along with their respective IP addresses. If there are any conflicts, you’ll see an error message that indicates which devices have conflicting IP addresses.
Another method to resolve IP conflicts is by releasing and renewing IP addresses. To do this, go to the Start menu in Windows, type “cmd” to open the command prompt, and type “ipconfig /release”. This will release the IP address of your device from the network. Then type “ipconfig /renew” to request a new IP address from your DHCP server.
You can also use third-party software to check for IP conflicts. There are many free tools available online that can scan your network for IP conflicts and provide you with a detailed report of any issues found.
It’s essential to resolve any IP conflicts on your network as soon as possible to avoid any disruptions to your network connectivity. By following the above steps, you should be able to identify and resolve any IP conflicts quickly and easily.
In conclusion, checking for IP conflicts on your network can seem like a daunting task, but it’s necessary to ensure your network is functioning correctly. Whether you use built-in Windows commands or third-party software, taking the time to check for and resolve IP conflicts will save you time and frustration in the long run.
Addressing router and modem connectivity issues
In today’s world, internet connectivity is essential for everyone. Whether it’s for work or entertainment purposes, we rely on the internet to stay connected and access information. However, when your router or modem malfunctions, it can cause frustration and disrupt your daily routine. In this article, we’ll discuss some common router and modem connectivity issues and how to address them.
The first step in addressing router and modem connectivity issues is to identify the problem. If you’re experiencing slow internet speed, intermittent connectivity, or no connectivity at all, there could be several potential causes. One of the most common reasons for connectivity issues is an outdated firmware or software. It’s important to keep your devices up-to-date with the latest updates and patches from the manufacturer.
Another issue that can affect your router or modem connectivity is interference from other wireless devices or appliances. This can cause signal degradation and result in poor connectivity. To address this issue, try relocating your router to a different location away from other electronic devices. You can also try changing the channel on your router to reduce interference from other nearby networks.
If you’re still experiencing connectivity issues after trying these solutions, it may be time to reset your router or modem. This entails resetting your device to its default settings, erasing any custom configurations you’ve made. Before doing this, make sure to back up any important data as the reset process will erase all data from the device.
In conclusion, router and modem connectivity issues are frustrating, but they can be resolved with some patience and troubleshooting. By identifying the problem, keeping your devices up-to-date, reducing interference, and resetting your devices, you can quickly resolve connectivity issues and get back online. Remember to contact your service provider for assistance if necessary and always prioritize internet safety and security by using a strong password and keeping your devices updated with the latest security patches.